Tuesday, December 31, 2013

Homemade pizza!

Let me just start by saying that, for about a year now, I have been participating intermittently in reddit gifts exchanges.  It's a branch of reddit, if you will, that organizes secret santa type exchanges between internet strangers.

Definitely people have their qualms about it, and definitely some people sign up and then don't give a gift, but in general, I think the system is pretty awesome.  The first time I participated, I received Killer Bunnies drinking glasses from someone who does glass etching as a hobby.  A more recent time, I sent someone some awesome stationary and was rewarded with pictures of their cat playing in the box.

This time around, my especially generous gifter gave me a cast iron pizza pan, which is incredibly useful for things like making pizza.  And bread.  Oooooh joy the bread baking I will be doing.

And seriously, look at that beautiful pizza.  Doesn't it make you just want to immediately pop that baby in the oven and replicate that beautiful pizza?
Not so fast.  First you have to make the dough, and that takes time.  You have to mix up some yeast and some water and some other things and let them sit so the yeasty babies can get ready to start nomming on some gluten.  Or however that works.

Then you have to add enough flour to make the dough easy to handle so when you knead it, it doesn't stick to your hands.

Note: two easy indicators of "easy to handle".  The shinyness of it (this dough is shiny and therefore damp enough to be sticky).  Also, the amount it sticks to your stirrer.  You can see here that it was still sticking to my stirrer a lot.
Once my dough was "easy to handle" (note: mine wasn't, quite), I spread some flour over the counter to prepare for kneading.  I usually recommend putting a cookie sheet down or something to contain the flour, for easier cleanup, but... I felt like making a mess this time around.

Plop that baby down and knead it!

Probably my favorite part of the baking process, it's hard to do wrong and it's so meditative.
Eventually the gluten gets super strong and your dough becomes... bread-dough like.  Nice and smooth and, in this case, a little too sticky and shiny.

But that's okay, I just left it out to rise, and then put it in the fridge.

Two days later, it was time to make pizza.
I sprayed the pan with cooking spray, since this is new cast iron and not quite non-stick yet.  Spread out the dough, added my favorite toppings (cheese and sauce) and my dad's favorite topping (anchovies).

Then it went in the oven.
As an out of order aside - this is a "pizza docker".  I got it in a previous redditgifts exchange, and hadn't used it yet.  You roll it over your pizza dough after spreading it out over the pan but before adding toppings to poke out any air bubbles in the dough.  I think.  I'm not 100% sure yet, but I did it, and the pizza turned out nicely, so I guess it did its job.
See?  Pizza!  It was a little bit doughy on the top of the crust in the center, but still delicious.  Our ideas for improvement of the slight doughyness:
1) Less watery sauce
2) Cook the crust for ~5 minutes before adding toppings
3) A little more flour in the dough (as I mentioned, it was still a bit sticky)
4) Pre-heating the pan and sliding the pizza onto it like they do in fancy pizza shops with stone ovens.

Overall?  Would definitely make again.  Actually, I have been informed that I will be making it again in 2 days.  Hopefully it goes as well or better this time.

Pizza
Recipe from my dear friend Kathrine
Makes one 12 inch pizza (I doubled the recipe to make a 14 inch pizza with a thick crust, and it was perfect)

Ingredients:
1/2 cup water (around room temperature)
2 and 1/4 teaspoons or one package of yeast
1 and 1/2 cups all-purpose flour
1 teaspoon olive oil
1/2 teaspoon sugar
Some salt (between 1/4 to 1 teaspoon)
Cooking spray
Toppings of choice
  1. In a large bowl, dissolve the yeast in the warm water. With a spoon, stir in half of the flour and all of the oil, salt and sugar. Stir in enough of the remaining flour, 1/4 cup at a time, until the dough is easy to handle.
  2. Sprinkle flour lightly on a countertop or large cutting board. Place the dough on floured surface. Knead by folding the dough toward you, then with the heels of your hands, pushing the dough away from you with a short rocking motion. Move the dough a quarter turn and repeat. Continue kneading about 10 minutes, sprinkling surface with more flour if the dough starts to stick, until the dough is smooth and springy. 
  3. Spray a large bowl with the cooking spray. Place the dough in bowl, turning it to grease all sides. Cover the bowl loosely with plastic wrap, and let it rise in a warm place 20 minutes.
  4. Gently push your fist into the dough to deflate it. Cover the bowl loosely with plastic wrap; refrigerate at least 2 hours but no longer than 48 hours. (If dough should double in size during refrigeration, gently push your fist into the dough to deflate it.)
  5. Heat the oven to 425°F.
  6. Spread out the dough on a pizza pan or pizza stone, sauce and cheese and top your pizza how you want it, and then cook for 15-20 minutes.

Thursday, August 8, 2013

Meat and Eggs and Bread (Oh my!)

A couple weeks ago, my boyfriend won a gift certificate to an Irish pub in my hometown.

This may be entirely the only reason why I came to be eating at an Irish pub that I'd never been to before, even though it's been in my hometown for... a while.

Regardless, the food was fantastic.  He had meat and potatoes something.  I had Shepard's Pie, which came with a slice of Irish soda bread.  And that is where this entire cooking fiasco started.

I'd heard about Irish soda bread before.  Something about a bread that's really easy to make because it doesn't require yeast.  Actually, I don't think I really got it until I ate it.  I knew it had baking soda in it, but it didn't occur to me until I was eating it that its... bread that uses baking soda as leavening.

(Don't laugh at me.  It's not like I really had any reason to ponder the reality of soda bread before.  I'm sure I would have figured it out if I'd tried.)

Anyways, the bread was delicious, and I immediately decided I wanted to make some.

Fast forward a couple of weeks.  Dinner had been late and lazy for a while, and I've been feeling like I want to cook more.  I get the impression that nobody has plans, so I ask my parents if they have anything they're interested in and intend to cook it.  No suggestions, except the one from my own stomach - the realization that, every time I smell dinner cooking, I start hoping it's meatballs.  I'm already planning on making soda bread that day, so I figure I can throw together some pasta and meatballs as well.

"If we don't have any frozen meatballs," I tell myself, "I'll make my own!"

So I stop by the store for some buttermilk for the bread, and head home.  By the time I get home, I've found I'm salivating at the idea of making my own meatballs enough that I don't want store bought ones regardless... so, once the bread is in the oven, I find a recipe and...

Getting ahead of myself here.  Bread first!

Soda bread is really easy.  Sorta.

Apparently, American Irish soda bread is more of a dessert bread - with sugar and fruit and things to make it sweet and more palatable.  That's not what I wanted.  I wanted bread.

So I found a recipe in from the New York Times that offered just that.
Basically, flour, baking soda, salt, and buttermilk.  Mix the dry ingredients, add buttermilk.

I didn't feel like making butter or anything this time, so I went ahead and just purchased buttermilk.  Reading the ingredients on my buttermilk, however... I think I'll stick to making it in the future.

Carrangeenan is a fun word to say, though.
The standard technique for mixing dry and wet ingredients is to make a well in the center of the dry ingredients and then add the wet to the well, and slowly mix.  Naturally, my well is never big enough and the wet ingredients always overflow.  Which is fine in a bowl, but once, I was making bread on the counter, and my dad just kept pouring the wet ingredients even after the overflowing happened... then we got to clean egg off the floor.
The bread mixed okay, but it was a little wet which made it hard to form nicely.  Lots of sticky-outty parts where my hands stuck to the dough while forming.

Also, it's usually a good idea to move the oven racks before pre-heating the oven.  Which I never do.  If you don't do that, at least move the oven racks before trying to bake something...


Now I'm going to pause my discussion of bread making.  Once I put the bread in the oven, I went and found a meatball recipe.  It was even Irish meatballs, because... well actually, it was the best one I found.  Looked tasty, and I had all the ingredients on hand already (yes, even the Panko breading.  Probably got 1.5 boxes of that stuff in the cupboard for some reason).

So I went to gather the ingredients, only to discover, to my horror, that I was wrong.  I didn't have all the ingredients.  Usually, I would respond to this by just omitting the missing ingredient, or finding a substitution... but when you're making meatballs, it's pretty hard to omit or substitute out... the meat.

The store is close, though, so I just checked how much longer the bread needed to be in the oven for... and, as it turned out, I hadn't set a timer either.  But it definitely hadn't been in for the full time, so I figured I was safe if I just took it out when I got home.

If the house three doors down had caught fire before, rather than after, this cooking incident, I probably would have just said "screw meatballs" and we'd have a happy blog post about bread.  Instead, I went to the store, bought some meat, and got back to...

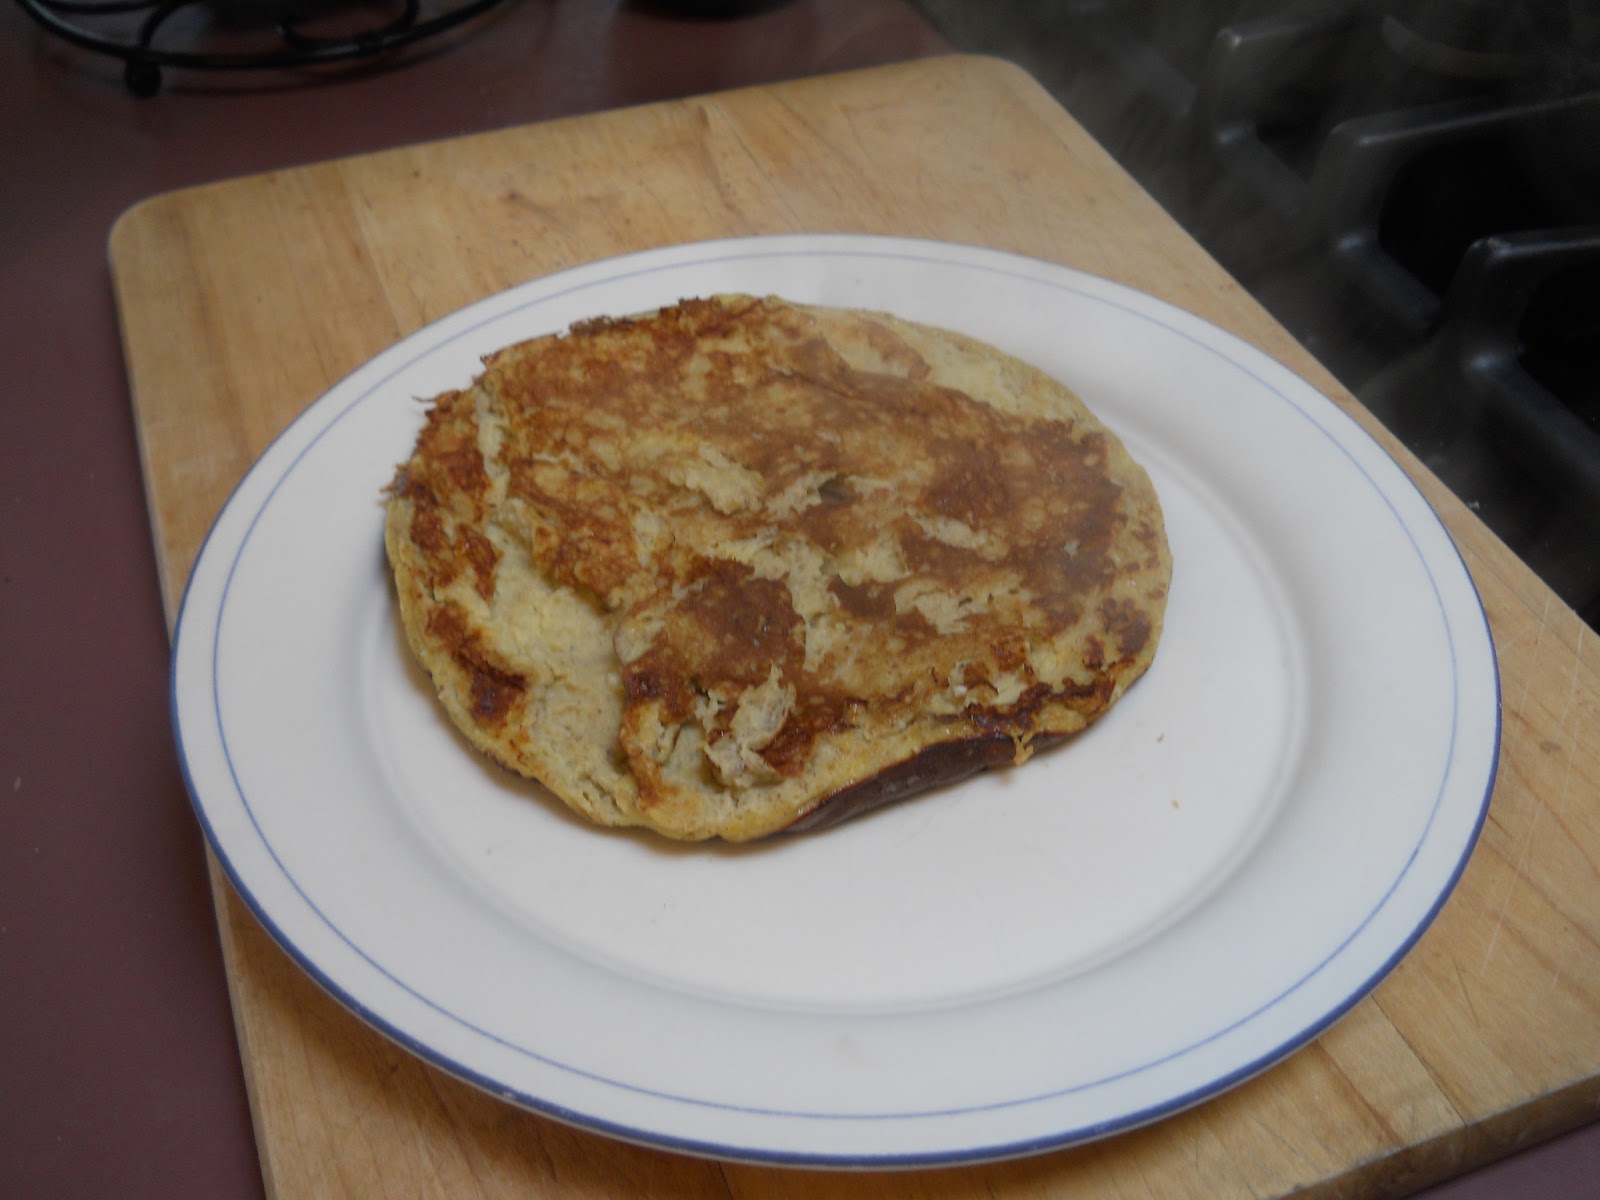
Slightly overcooked but still mostly delicious Irish soda bread.

Also, totally formless and I think this gets a score of "not yet perfect, try again".

Hm, I should implement a scoring system on my blog, on a scale from "never again" to "never change".
Now that I was much further behind schedule than I'd wanted, I started making meatballs.

Basil, garlic, onions, things that taste good with meat and pasta sauce, basically.
Then, meat.  I halved the recipe because who really wants to be serving 40 meatballs to 3 people.  Even a pound of meat seemed excessive, but I figured I'd go for it, and besides, the recipe called for 2 eggs and I like to avoid halving eggs.

As per the recipe, I mixed the meat and everything else but the eggs together, then added 2 eggs and mixed that.
When I started forming the meatballs, they ended up large, so I only made 13 instead of the expected 20... they also ended up really soggy.  Like... really soggy.  The last few I pulled out of the bowl were so saturated with egg that it was more like an egg ball with meat added than a meat ball with egg.

No matter though.  I carried on through the strangeness.
They all got plopped on a pan and popped in the oven.

I realized my mistake when I went to "shake the pan so meat browns on all sides", as per the recipe.

They didn't shake, that's for sure.  When I prodded with the spatula, they mostly just fell apart (as you can see from the final, cooked picture).


Wondering what I did?  Go back and reread the paragraph next to the picture of meat.  I halved the recipe, which called for 2 eggs.  Then added 2 eggs.

I got extra eggy meatballs.  I suppose this kind of thing is the cause of most of my kitchen disasters (doubling only the butter and sugar in cookies, etc).  And the meatballs were still delicious, especially on a pile of pasta and red sauce with a side of soda bread.

An unconventional dinner, but it worked, and I loved it.  I'd definitely make these meatballs again... perhaps with the right amount of egg next time.

Sunday, July 28, 2013

The Almost Curry

Sounds like it could be a band name, eh?

Anyways, I've never been a huge fan of curry, but when I found a thread on reddit "How do you make an authentic curry?" I thought... hey... all my friends like curry... so why not try it?

Naturally, being a reddit thread, there were plenty of recipes for curry.  So I listed a bunch of ingredients and we took a trip to the Asian market and found them.  And started cooking.

Admittedly this happened so long ago that I don't actually remember much of the process or the recipe.  But inevitably we had to chop things up.

Onions, potatoes...
Chicken...

Two notes here - one, I was glad for how many cutting boards I had in my college kitchen.  It meant I could chop a bunch of things up at once.  Two, it's way easier to cut chicken with kitchen scissors than with a knife.  It is also way harder to wash the scissors than a knife, but probably worth it.
Here is probably where things started to be weird.  The recipes we had called for the same ingredients in different proportions.  So... I think we guessed.

Or something.

Anyways, we probably should have used the entire packet of curry paste.

Also those cinnamon sticks were cool.
Everything gets dumped in a pot and cooked for a while.  Which admittedly seems strange to me because chicken, but the chicken in this picture is clearly not cooked yet.
At this point, we realized that we didn't have a can opener (I'd loaned it to my clinic team and it was on the other end of campus).  The old school poke a hole in the top of the can type opener worked fine for the coconut milk, but not so much for coconut cream...
This looks curry enough.  Doesn't it?

I actually ended up loving the curry - the spices were more diluted, and it was overwhelmingly coconutty.

Unfortunately, those people who actually like curry (or at least one of them) were far less impressed.  And I didn't like it quite enough to want the leftovers...
So I think next time we find a better recipe.

On the bright side, the bottle of wine we'd decided to drink with the occasion just happened to claim to go well with Indian food.

Total coincidence, I swear.  I don't have the slightest idea how to do wine pairings, but at least that part of the meal worked.  (And, well, the part where I liked it).

But otherwise, I think next time I make curry (if there is a next time), I'll be sticking to a single recipe.  Maybe if Alton Brown has one...

Thursday, June 27, 2013

Cup(cheese)cakes!

Yeah, you read that correctly.  Though it may have seemed impossible, I have improved upon both the cupcake and the cheesecake by combining them into the cup cheesecake.

I'd seen the idea somewhere on the internet, but most googled recipes for a cup cheesecake use some form of vanilla wafer cookie for the crust and then a cheesecake batter top.

Boring.

Why use a vanilla wafer cookie as a "crust" when you can make a genuine graham cracker crust?
I actually didn't have that thought process.  My actual thought process when making the cup cheesecakes was more along the lines of...

"Whoops.  I made two batches of cheesecake batter and I only have one springform pan!"

Because the cheesecake has to cool overnight in the pan, baking one after the other isn't really an option.
Instead I remembered the idea of the cup cheesecake.  So I grabbed a couple muffin pans (1 cheesecake recipe = 24 cup cheesecakes), inserted liners, inserted graham cracker crust into each one, poured out the cheesecake filling, and baked... for some amount less time than a normal cheesecake bakes for (I didn't really keep track of time).

When they were done, I had single serving mini-cheesecakes!  The size was perfect for casual sharing, something that has always been hard to do with normal cheesecakes (because slicing a normal size cheesecake is a bit frustrating sometimes...)
The only downside was that the second batch of crust had, for whatever reason, ended up way butterier than the first batch, and a lot of that butter leaked through the cupcake wrappers, hence the post it note in the first set of pictures (to keep grease off my desk).

This isn't really a huge problem, though.  Not compared to the amazingness of the cup cheesecake.


Admittedly, this isn't much of a food adventure for me.  Cheesecake has been a lifelong love, and I've only really eaten my dad's cheesecake... which means that when I left for college and realized I wanted cheesecake, I only had to call him and get the recipe.  I've only had one cheesecake fail and I blame the oven for that one (it was still undercooked after having been in the oven for about twice as long as it usually needs).

Cup cheesecake, however, is still a fantastic experiment that I'm really happy with.  I'll definitely be making these again sometime.

Cheesecake (Recipe originally from a Good Housekeeping cookbook, I think)
Crust:


1 package graham crackers
¼ cup coarsely chopped walnuts
2 tablespoons brown sugar
1 teaspoon ground cinnamon
½ cup (1 stick) unsalted butter plus a little more

Filling:

1 16oz container of sour cream
3 packages (8 ounces each) cream cheese, room temp
3 eggs, lightly beaten
1 cup granulated sugar
½ teaspoon salt
2 teaspoons vanilla extract
Finely grated zest of 1 orange


  1. Smash graham crackers (seriously the best part of the process)
  2. Preheat oven to 350°F
  3. Melt butter
  4. Combine crumbs, walnuts, brown sugar, and cinnamon.  Add the butter and toss to mix.
  5. Save 3 tablespoons of the mixture for the top of the cheesecake and press the rest evenly and firmly into the bottom and slightly up the sides of a 9-inch springform pan.  (OR: Evenly distribute into 24 cupcake cups, pressed into the bottom of each cup)
  6. Bake crust for 10 min at 350°F with a baking sheet underneath to catch dripping butter (baking sheet not necessary for cup cheesecakes).
  7. Cut cream cheese into pieces and add to blender a few pieces at a time with the sour cream.  Add sugar and salt, blend until very smooth.  Add eggs and blend just a short time to avoid air bubbles.  Then fold in the vanilla and fold in the zest.
  8. Slowly pour batter in pan over crust and bake for about 45 minutes (15 minutes for cup cheesecakes).  If the top is not starting to turn brown and it still looks wiggly (when the center is still loose and moist and only the very edges are rising but it looks as if it is about to start hardening), or the bubbles are turning brown, remove from oven and add the topping.  Then bake another 10 minutes. 
  9. Let cool completely.  Refrigerate until ready to serve. (My dad prefers to take the cheesecake out of the fridge an hour or so before serving, I like my cheesecake cold.)
  10. When cutting, use a long slender knife and wiggle it back and forth (don’t saw).  Rinse or wipe the knife off between cuts.  Best when shared with friends!

Wednesday, June 19, 2013

Banana Pancakes. Or Omelet. One of those.

On Thanksgiving, my cousin and I had banana pancakes for breakfast.  We spent the morning singing that Jack Johnson song.

For whatever reason, when I think about these banana pancakes, the song that comes to mind is this thing.  Just replace strawberry with banana.  And more in Jack Johnson style.  I doubt any of you can picture that, but anyways.

According to somebody on Reddit, you can make pancakes from 2 eggs and a mashed banana.  A few other people chimed in with other things that are good to add.  So I set out to make myself an easy, delicious lunch.

2 eggs, one ripe banana, some brown sugar and some cinnamon.  Just mash it all together and go, right?
 Yes!  It actually is that easy!
 I had meant to make 2 pancakes, but something about egg... it spreads.  So I poured it all into the pan like an omelet (is it really spelled like that?)

Banana omelet.  Have I mentioned that I'm not a huge fan of eggs?  My opinion of them is... a little scrambled.

I'll show myself out.
Though, one thing I know I don't like is undercooked omelet.  So I flipped it, somehow.  It got a little overcooked.
And then when I flipped it back...

I'm not sure what to think of this, honestly.  It doesn't look to appetizing does it?

Well, it was delicious.  Almost.  A little too eggy for my tastes, but definitely has potential.  The egg and banana do go together surprisingly well.  Plus, it's definitely good enough to eat plain (which, IMO, pancakes rarely are).  I think next time I'll use 1 egg and 1 banana, or add some other fruit to it.

So I say, try it.  You won't be (too) disappointed!